10/24/2023
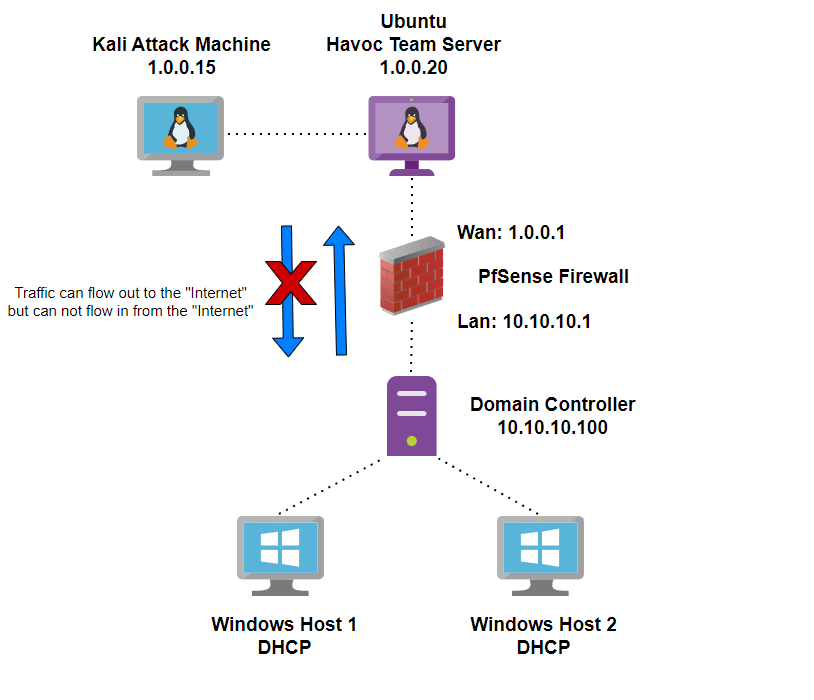
One thing that has commonly stuck out to me about most of the pentest labs that you see online is that they often consist of a Kali machine on the same network as the target machines. This setup is great for testing out new exploits and practicing techniques such as kerberoasting. However, my goal with this project is to simulate a real world attack so that I can better understand what hoops an attacker needs to go through as well as what capabilities attackers may have from outside of the network. The difference between the lab that I will be building throughout the course of this blog and others that you may see online is that my attack machine sits outside of the targets network firewall. This increases the level of difficulty and introduces new hurdles that many labs do not cover. Below is a diagram showing the general layout of the lab I have in mind (we will grow from there).
For the setup of the lab I will not cover every step, I will cover the setup of the firewall, Havoc team server, Havoc client on the Kali machine, and network addressing scheme. If you need help setting up the Active Directory portion of the lab check out this video from TCM.
Once we have our active directory infrastructure in place we will need some vulnerable users, groups, ACLs etc. For my lab I used this PowerShell script from safebuffer to automate the creation of my active directory environment.
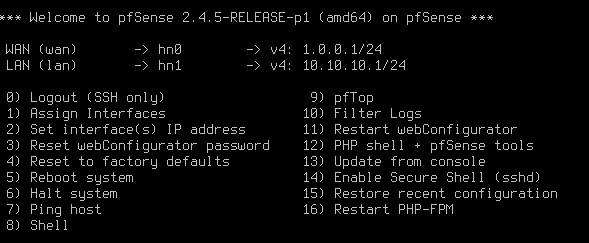
Now that we have our AD environment all set we will need to configure out firewall. For this I am using a PFSense virtual machine that is configured with static WAN and LAN Ip addresses as seen below (I chose to use the 1.0.0.1/24 network which is a public ip range to help ease the routing issues between the two networks, this does cause a problem where I can not browse the internet on the Kali machine without switching to a different network adapter).
Next, I assigned static Ip addresses to both the Kali virtual machine and the Ubuntu virtual machine that will host our Havoc team server. Their Ip addresses are 1.0.0.15 and 1.0.0.20 respectively.
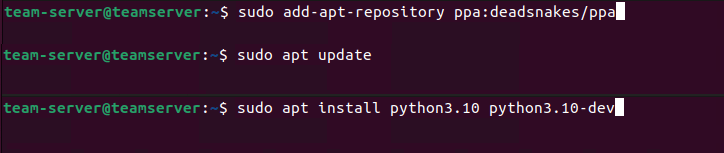
Finally with all of the networking out of the way we can get to the building of our Havoc C2 infrastructure. Luckily for us C5pider has provided some great documentation on the setup and configuration of the Havoc framework for us. Since we will be running the team server on our Ubuntu virtual machine we can start by installing the deadsnakes repository as well as Python 3.10 with the below commands. Keep in mind that you may need to add a separate network interface to your Ubuntu VM to be able to reach the internet and download/install Havoc!
Next, we can download the Havoc repo with the command:
git clone https://github.com/HavocFramwork/Havoc.git
Now that we have the Havoc repo downloaded we can cd into the Havoc/teamserver folder and install some Go dependencies that will be needed for the team server build. Use these two commands within the team server directory to download the repositories:
# go mod download golang.org/x/sys
# go mod download github.com/ugorji/go
# cd ..
Now we have our go dependencies installed and we are back into the Havoc root directory we can build our team server with the below command:
# make ts-build
We finally have our team server built on our Ubuntu virtual machine, now we need to get our client built on our Kali virtual machine. I am going to go through this a little faster since many of the steps are the same as when we installed the team server. First we need to install some dependencies and download the Havoc repo on our Kali VM with the below commands:
# git clone https://github.com/HavocFramework/Havoc.git
# cd Havoc
# apt install -y git build-essential apt-utils cmake libfontconfig1 libglu1-mesa-dev libgtest-dev libspdlog-dev libboost-all-dev libncurses5-dev libgdbm-dev libssl-dev libreadline-dev libffi-dev libsqlite3-dev libbz2-dev mesa-common-dev qtbase5-dev qtchooser qt5-qmake qtbase5-dev-tools libqt5websockets5 libqt5websockets5-dev qtdeclarative5-dev golang-go qtbase5-dev libqt5websockets5-dev python3-dev libboost-all-dev mingw-w64 nasm
Next, we can cd into the Havoc directory on our Kali machine and run the below command to build the Havoc client:
# make client-build
At this point we should have a Havoc team server installed on our Ubuntu machine and the Havoc client installed on our Kali machine. Go to the Ubuntu machine and start the Havoc server by navigating to the root Havoc directory and running:
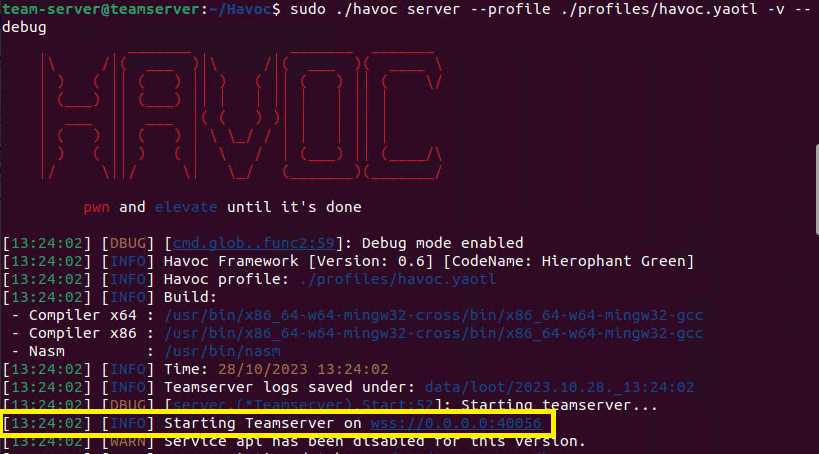
# ./havoc server –profile ./profiles/havoc.yaotl -v –debug
Assuming that the team server starts correctly you should see the screen below (the highligted portion shows that the server started on port 40056 which is the default port for Havoc). Also take note that we started the team server using the profile stored in the Havoc/profiles/havoc.yaotl file. This file can be customized to change login information, ports, compiler, and more which we will cover in later posts.
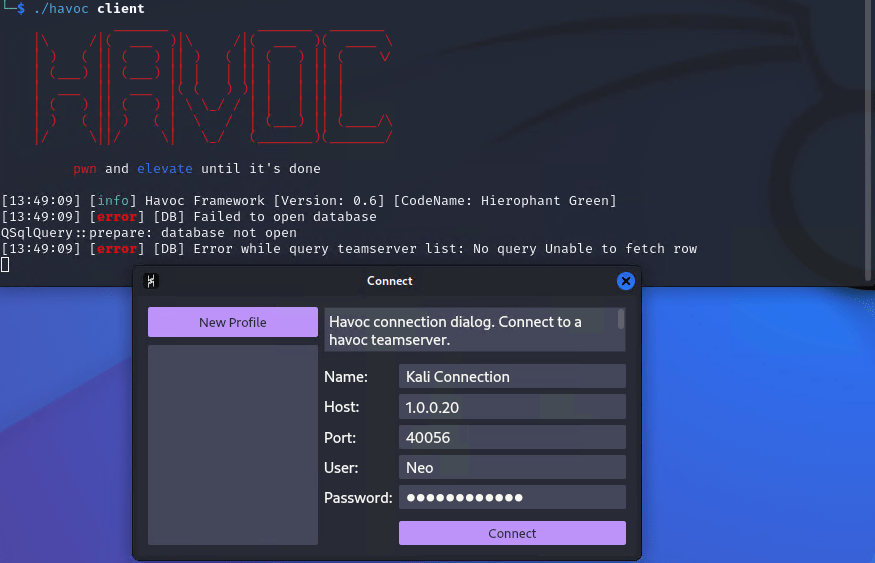
Now that our team server is running we can switch over to our Kali machine and connect to the server with our Havoc client. We can run the following command within the root Havoc directory:
# ./havoc client
We will then be greeted with a connection popup box that will make the connection to the team server. The name of the connection can be anything you would like, the host is the Ip address of the Ubuntu machine running the team server, the port is set to the default that we noted earlier and the username and password combo is Neo:password1234 which we can find in the havoc.yaotl file on the team server.
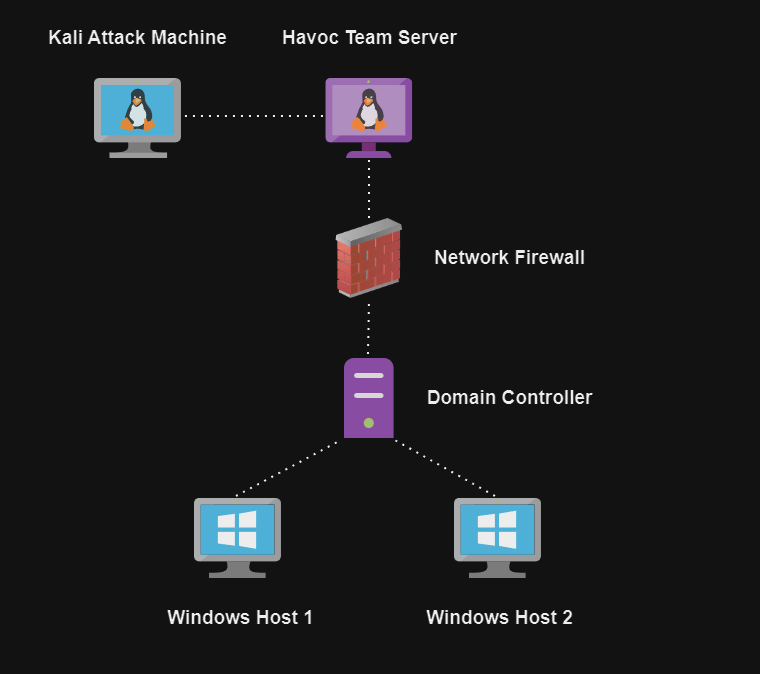
At long last all of our hard work has paid off and we are able to bask in the glory of the Havoc dashboard. At this point our lab is all setup and we will begin to cover how to use the Havoc C2 framework to leverage attacks against our Active Directory environment. Below is an in depth network map of the lab including Ip addresses in case you would like to mimic my setup.